In the inaugural installment of a new feature we’re calling Steal My Craft, we ask Sebastian and Alice of Miwak Junior to talk us through how the Varyer + Miwak Fingerprint Pipe was made.
(you can listen to Sebastian's ambient work playlist here, we recommend it for reading this piece) ⤵
Miwak Junior is a duo, made up of Alice and Sebastian. Sebastian takes care of production, Alice takes care of business.
“We’re such accidental business people.”

Sebastian, a printmaker, enrolled in ceramics arts when in search of a student visa, he thought he’d pick up something easy at Pasadena City College. He quickly found that ceramics was no cake walk, but the influence and approach of his Japanese professor made Sebastian fall in love with the medium.
Minimalism when it comes to tools and delicate design continue to inspire the Miwak process. While admittedly a self-described “tool-freak,” Seb recounts witnessing Yukiya Izumita conduct a masterclass with a simple wooden tool used for everything, besides sculpting with hands.
“... I watched Izumita make a vase in person using only a found, small wood stick. I love his work, it is very organic yet very refined, perfect balance. It was amazing to see him work.”

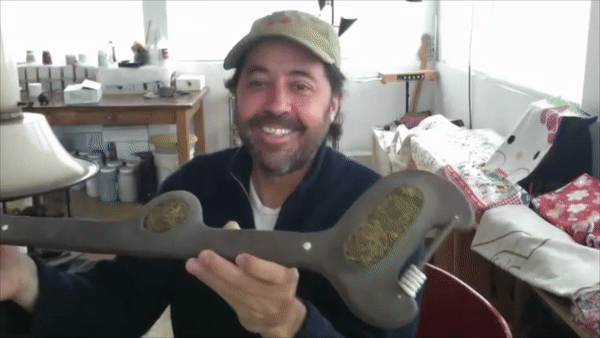
Hi, this is Sebastian, the maker of the pipes.
After firing a few pieces, his interest became fully-baked. Ashtrays and pipes were not allowed to be fired at the college, and thus were inherently enticing pieces to make. His first pipe was thrown away, as was the second. As a challenge to himself, Sebastian began his quest to obfuscate the form of the pipe beyond immediate recognition to beat the system.
The pipes themselves are a product of disparate visions. Teenage Sebastian went backpacking in Teotihuacán to explore La Ruta Maya tomb, following a National Geographic guide. He noticed that after his visit to the ruins, his drawings all started to share the same feeling.
His work is influenced by sculpture, ideations of anachronistic shapes, calendars, spaceships, futuristic tribalism, temples, meticulous and atmospheric Kubrickian 2001: A Space Odyssey vibes, Star Wars— things that would feel completely at home in a futuristic archaeological dig, unearthed in a science fiction burial ground.
After a few years of persistent requests from Sebastian’s friends for pipes of their own, Miwak Junior as we now know it officially began in 2016. He and his business partner, Alice have a very clear excitement about the brand itself. The two emanate an inviting energy not unlike the pipes themselves, that of an inherent curiosity.

The prototype (smaller, right) survives. Through refinement and dedication, Sebastian has honed his craftsmanship to a repeatable process to create the Miwak pipes we recognize today.
“It was a natural and organic transition into business from hobby. It was just so clear that there was something there, something happening.”
All of the production happens in Seb’s studio at the simple table he works from.
A theremin can be seen nearby, and several covered synthesizers. He describes the space as “one little part of the home, a living room with a fireplace in the middle; part clay, part knobs.”

Sebastian brings out a sculpture he made; in a mystical future, sacred seeds are presented on this spiritualagricultural talisman in a ritual yet to-be-established. They are future relics, things that seem to exist in a parallel reality, slightly removed from our own present confines of time and space. We learn of a fondness for Hello Kitty and the custom screen printed keyboard dust covers that he is making with a friend (completely aside from the pipe biz— good luck getting one).
When the ritual agricultural talismans come out, you know the interview is heating up.
part clay part knobs part clay part knobs
Seb shares his process with us with complete transparency. Through the conversation, we casually learn this isn’t the first time he’s let people in; Sebastian runs workshops where he lets students build their Miwak pipe using his molds!
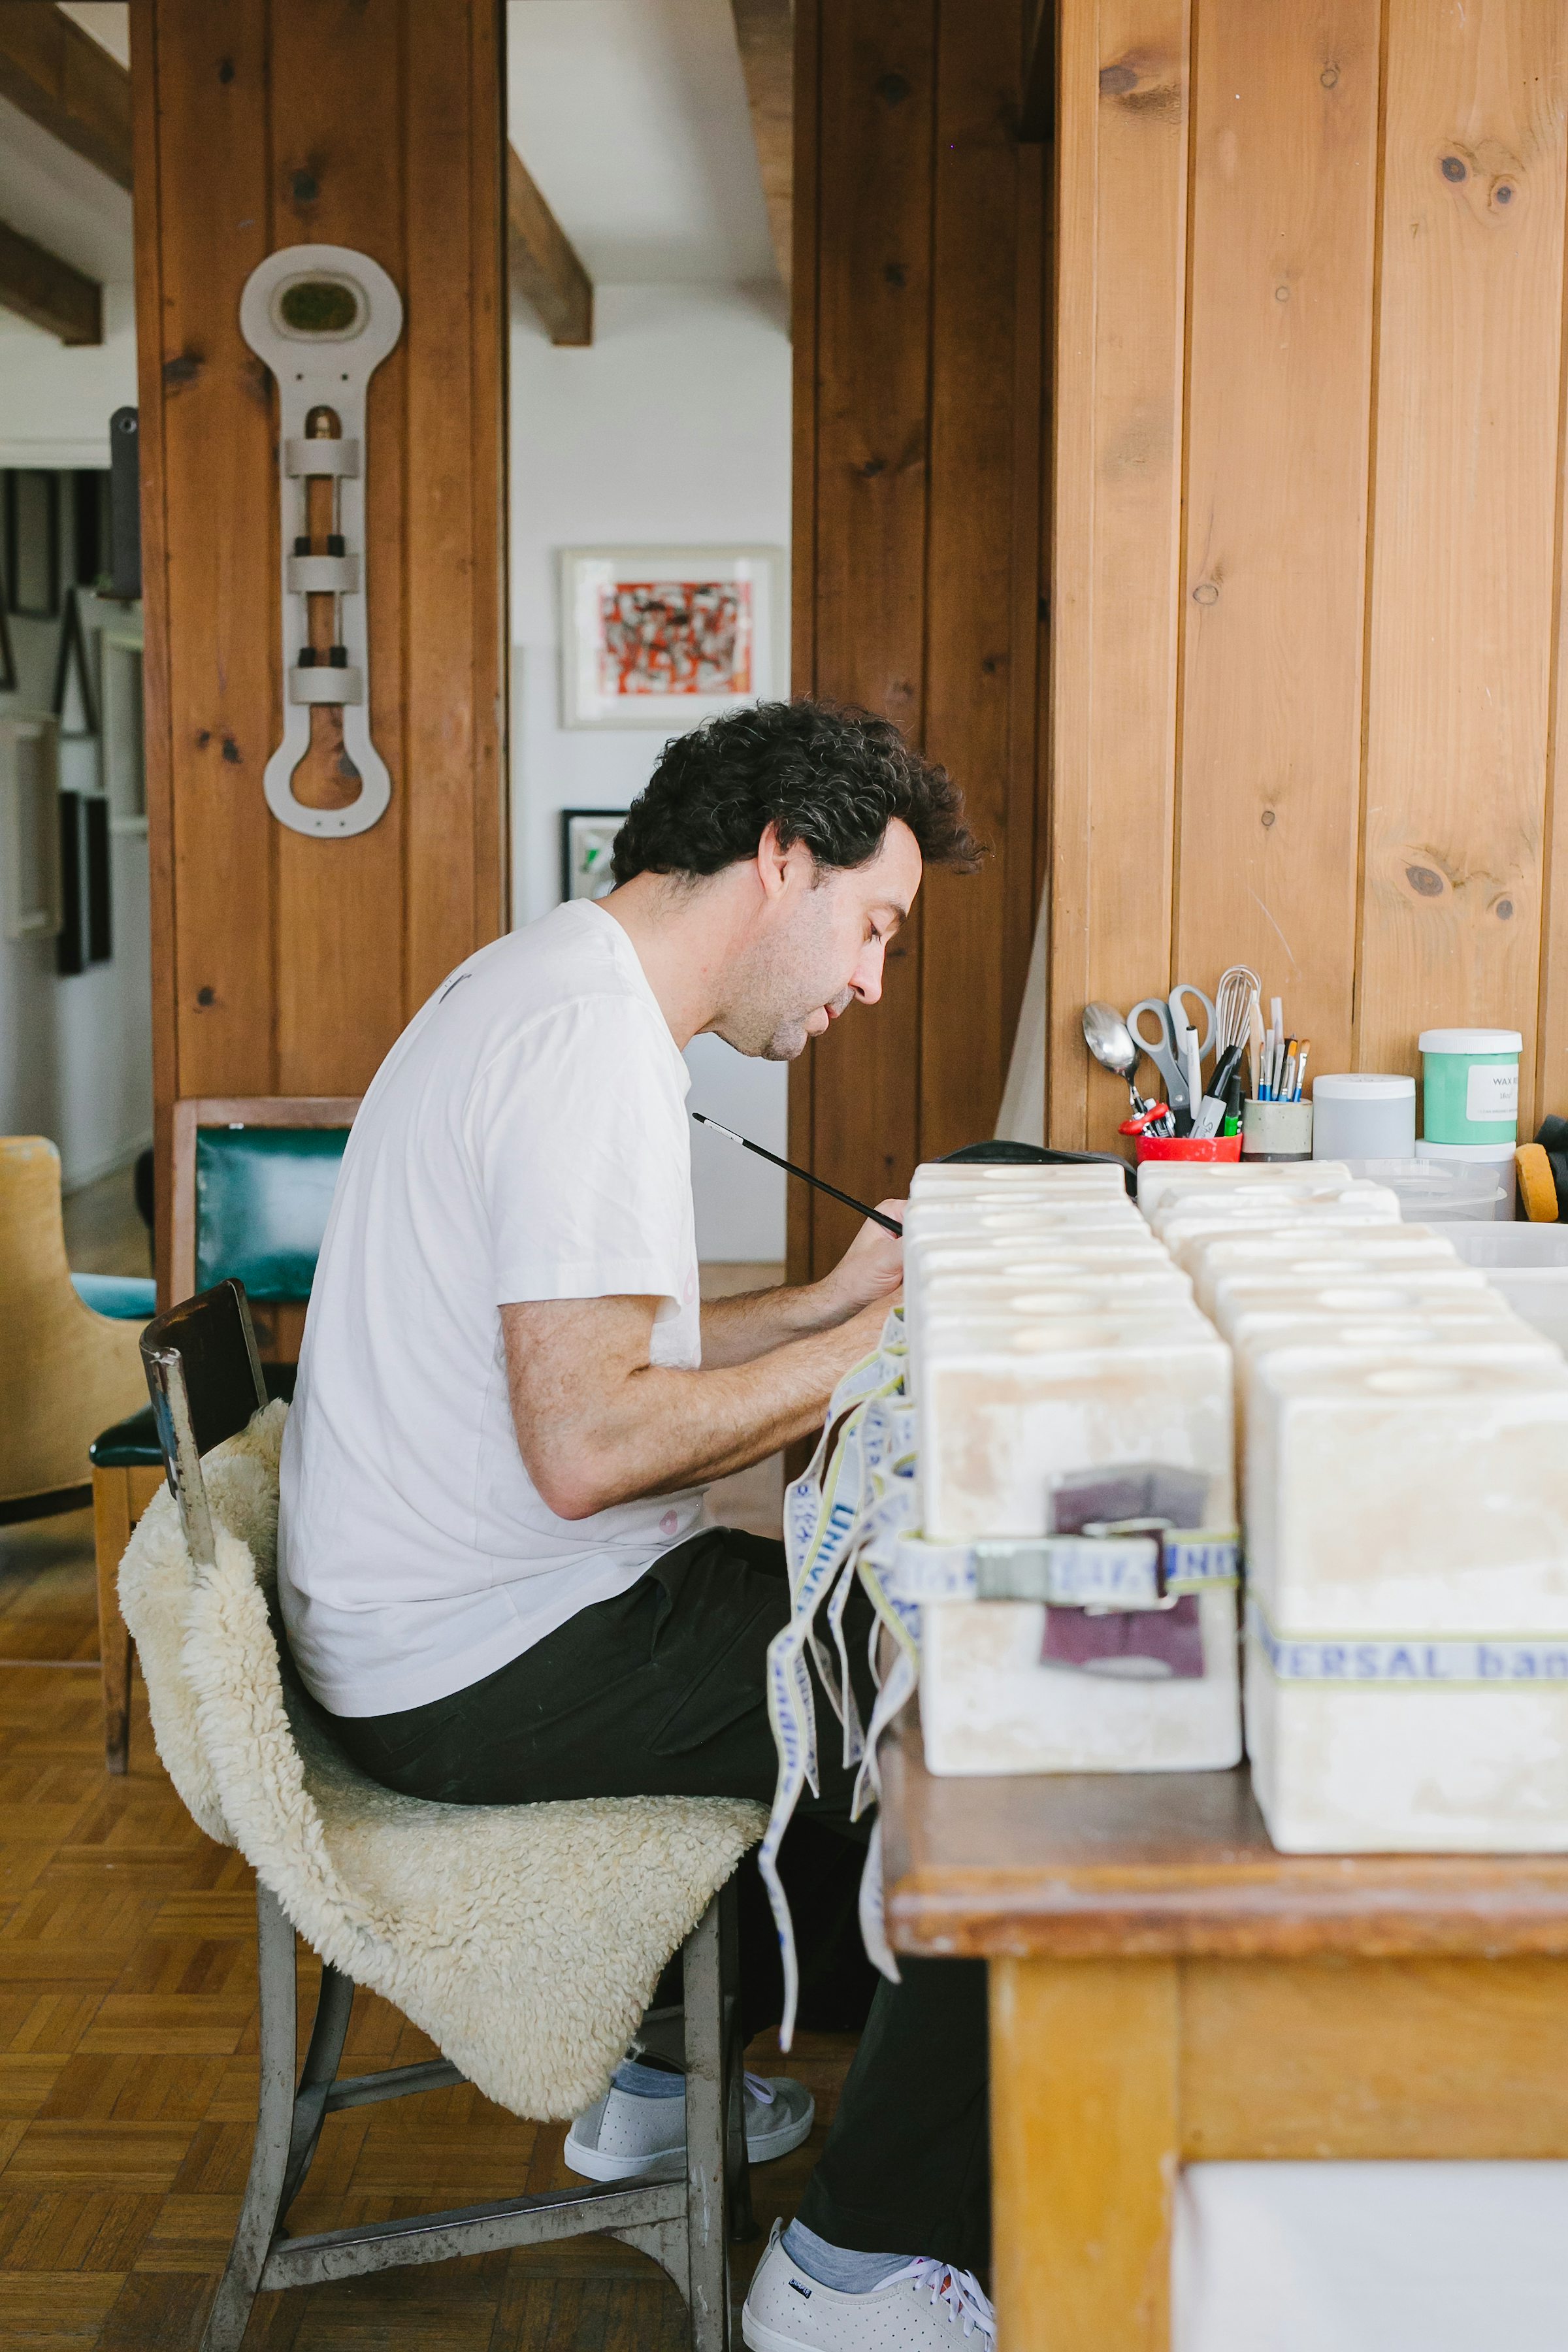
Before coffee or any trifling metabolic concerns, Sebastian likes to get straight to casting. All of the freshness of a new day goes right into his ceramic pieces. An advantage over time is gained by getting these molds poured and drying early, often accompanied by the sounds of ambient music (check out the playlist he made!) or podcasts like Hanging Out With Audiophiles.
Most Miwak pipes have a similar process, but the Varyer + Miwak Fingerprint Pipe collaboration has a few extra steps based on its unique design.

it all starts with clay it all starts with clay
Cone 10 refers the traditional high-fire ceramic range. Ceramic artists have used this number (2350 F) to fire stonewares and porcelains for the past few centuries.
It all starts with clay. Sebastian gets his from Laguna Clay. Using mostly stonework clay and porcelain, he mixes his own clay colors with a pre-fire coloring material called mason stain.
Sebastian fires his clay at cone 10. This very high firing temp ensures that the piece gets fully vitrified, or sealed.
Cone 10 refers the traditional high-fire ceramic range. Ceramic artists have used this number (2350 F) to fire stonewares and porcelains for the past few centuries.
STEP 1
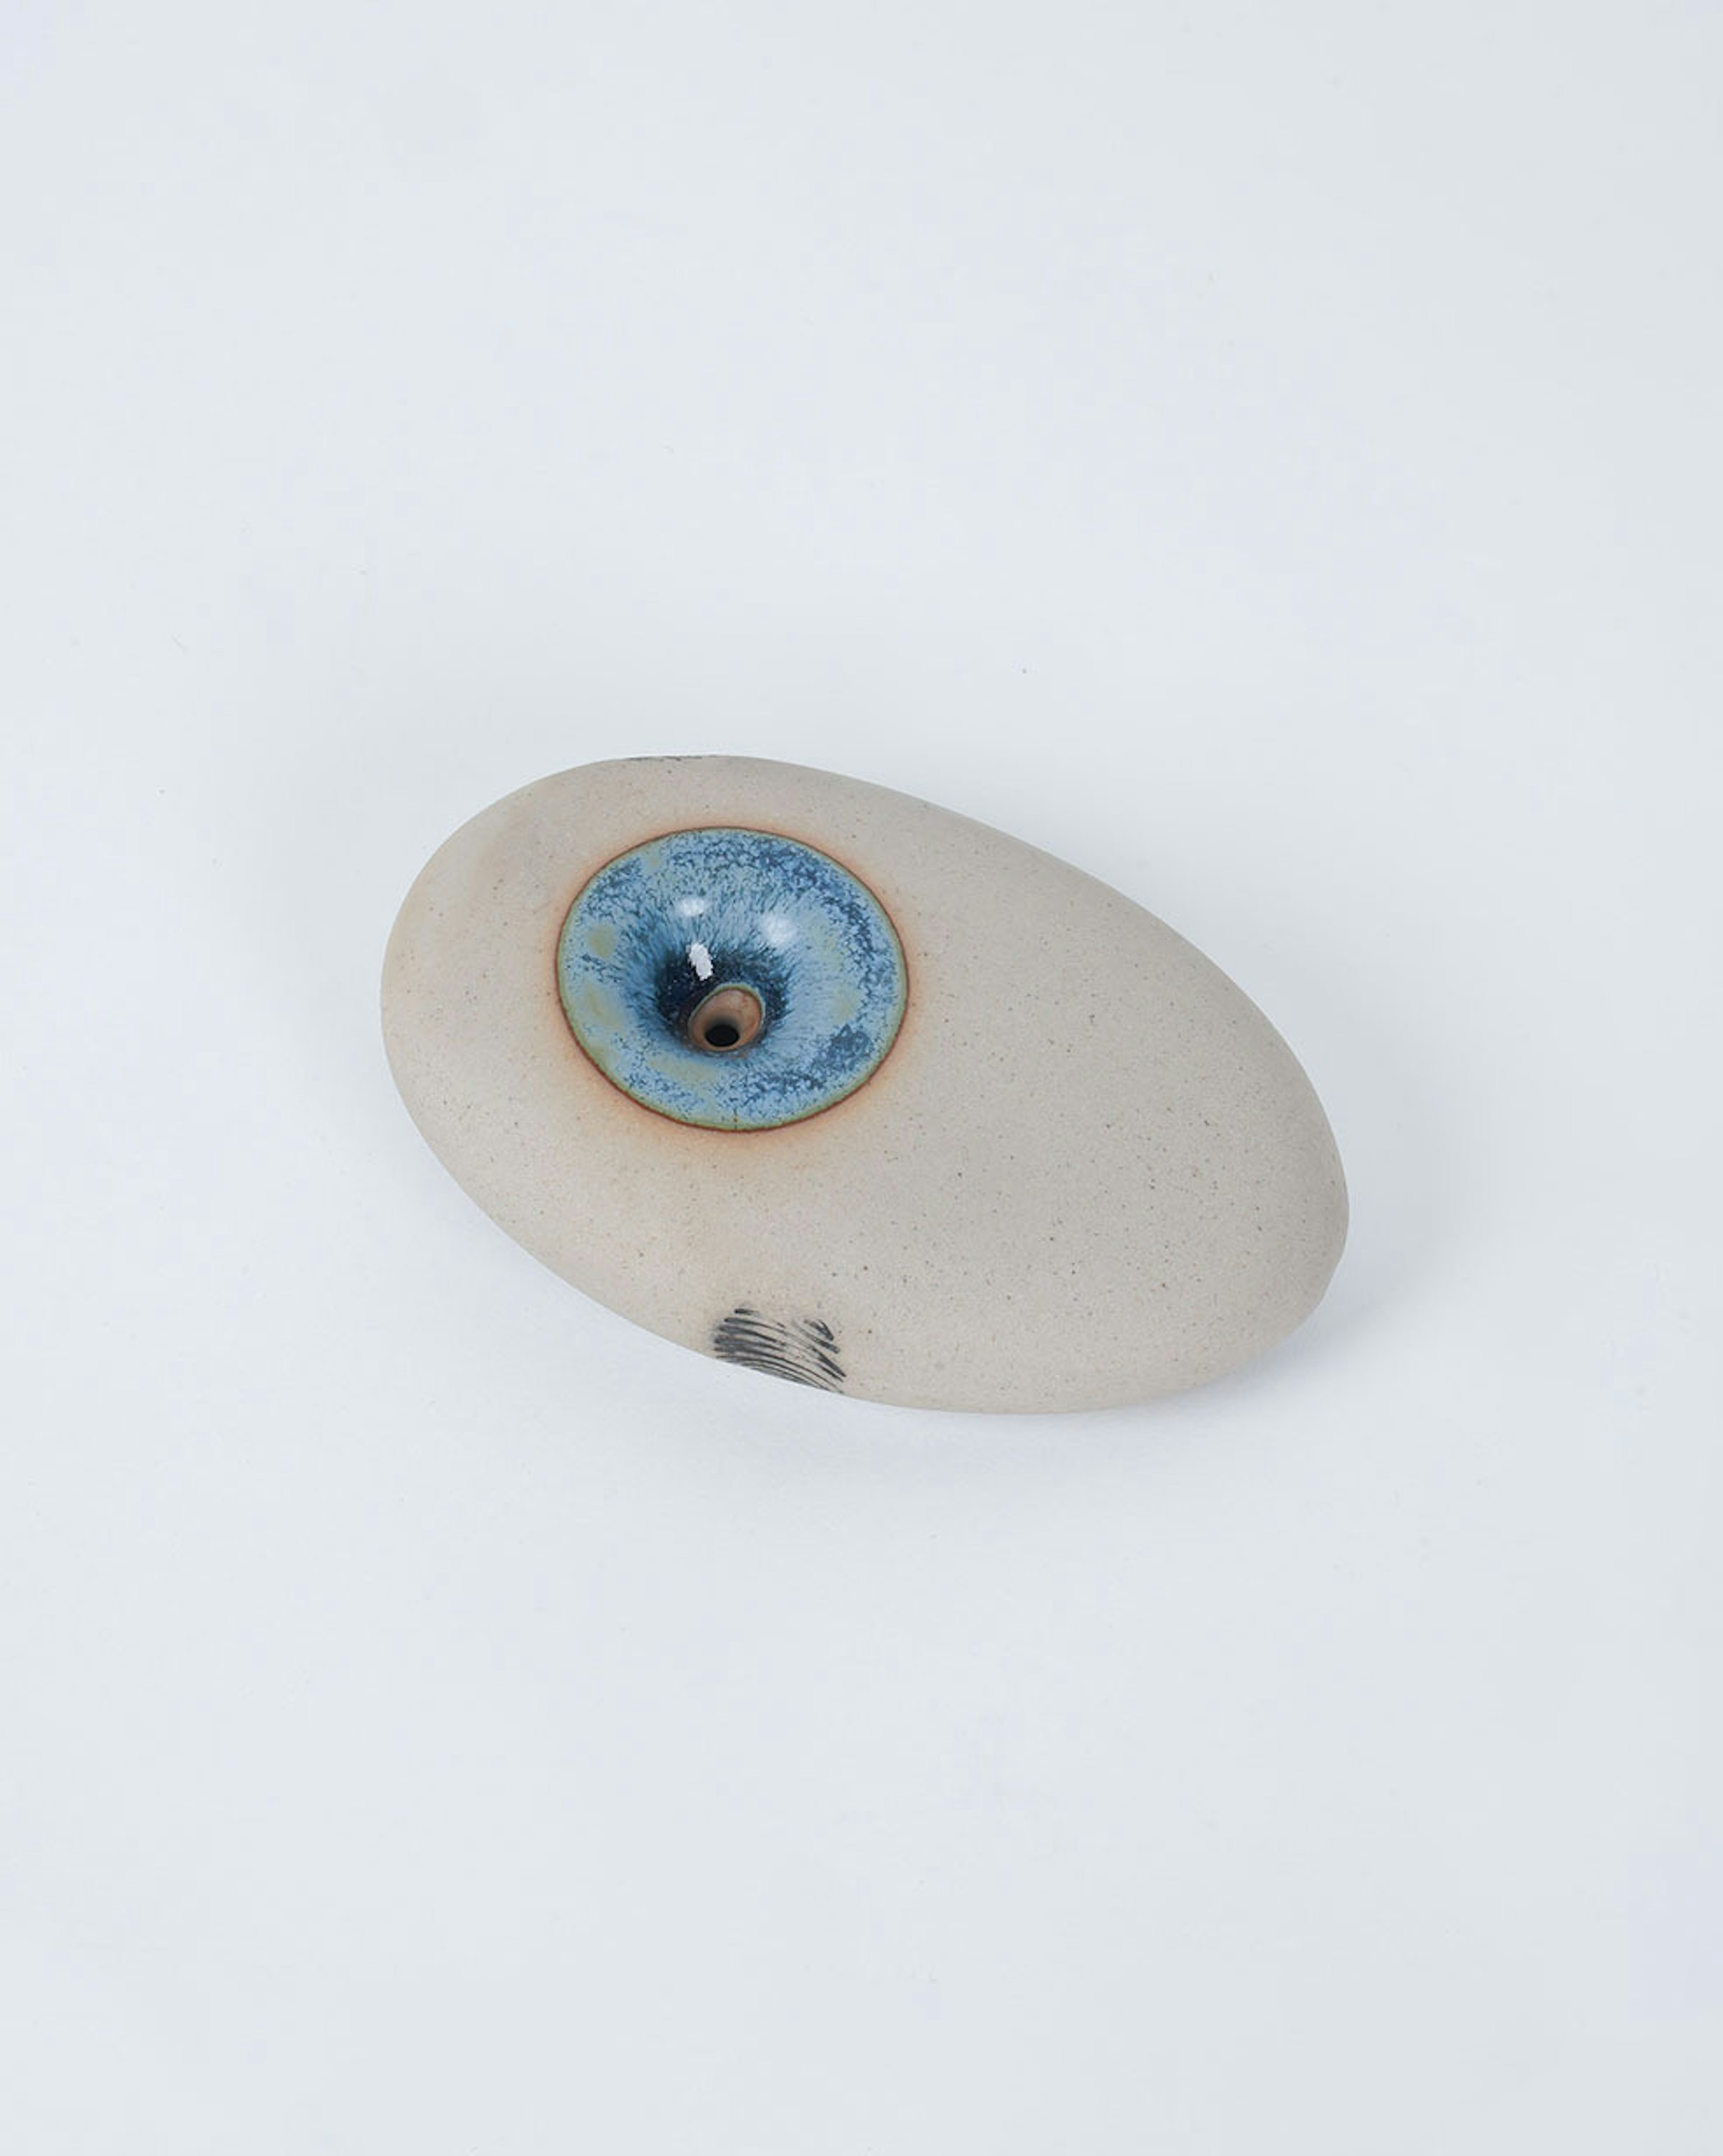
Varyer came up with the fingerprint concept—a nod to the handiwork of the pipe’s creation, and a more obvious instruction on where to grab the pipe from. We used two vector fingerprint images.
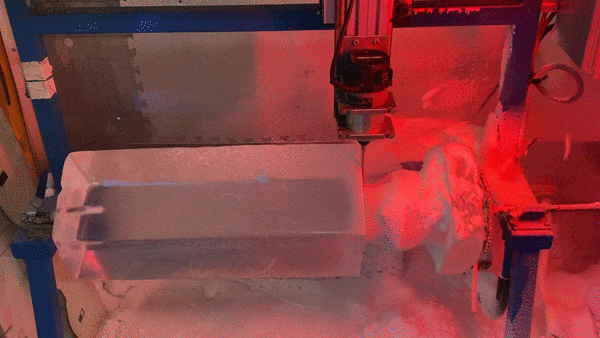
To create the fingerprints, a 3D printed stamp was impressed upon the wet clay pipe. On the first stamp, the lines of the fingerprints were too close together, and the stamp lacked definition. We revised our designs, and the second 3D printed stamps produced much better results.
(we didn’t actually steal anyone’s identity).
STEP 2
The process that follows is called slip casting. This part's important. A special plaster mold is filled with liquid clay with a precise viscosity and specific gravity.
The plaster slip casting molds are made from a mother silicon mold. They have a finite number of times they can be used before beginning to degrade, at which point they will be replenished from the mother mold.
The clay starts drying from the wall of the mold inward. Once the desired clay thickness is achieved, the mold is tilted down and all the still-liquid clay drains out. This leaves a clay “shell” inside the mold— that is the actual pipe. This process is what allows the piece to be hollow, and the chamber is crucial for optimal pipe function, pulling the smoke inside to cool down producing a smoother hit.
After the excess liquid clay is emptied out, the mold is left to dry for about an hour. It is carefully de-molded, and the pour-hole left from the mold is closed by hand. This process is very time consuming.
STEP 3
For the Varyer + Miwak Fingerprint Pipe, the de-molded pipe is left to dry a bit longer outside of the mold to increase its rigidity. Each of the two fingerprint stamps are pressed into the sides of the pipe with a precise amount of pressure to make the imprint. This takes time and practice to get right. The pipes are then left to fully dry.

The mold acts as a solid sponge that extracts moisture from the clay.

That awesome fireplace in the center of Seb’s studio? While it does work, it’s not a kiln.
Short for Biscuit, bisque firing is done on unglazed clay pieces and makes it so that they are less porous. This decreases its risk of being damaged later in the glazing and re-firing process.
STEP 4
The pipes are carefully sanded to get ready for their first firing: bisque firing. Since he doesn’t have his own kiln, he uses one owned by Heather Levine, a ceramic artist in Los Angeles. There are around seven other ceramic artists that work in this manner, The firing part has always been a handoff for Sebastian. He tells us that learning to fire is the terrifying final step of being a ceramicist—his pieces are put into the kiln under the lead of firing and glazing master Junzo Mori. Sebastian speaks positively about the cross-pollination of knowledge in his local ceramics community.
Short for Biscuit, bisque firing is done on unglazed clay pieces and makes it so that they are less porous. This decreases its risk of being damaged later in the glazing and re-firing process.
“Everybody’s sharing all the time. Some people are of course more protective of their things, but it’s very common in ceramics for people to share what they’ve learned.“

STEP 5
After the bisque fire, black underglaze is applied in the thumbprint and index print indentation. It is sponged off to leave the underglaze only in the grooves; a similar process that one would perform while etching a copperplate print.
The round pipe bowl is then glazed by hand, before the piece is returned to the kiln for its last glaze firing and pray for the best.
THE RESULT?
A happy collaboration on both sides! The thumb and index prints add a lot of unique character to the V+ Miwak pipe.
Sebastian’s First-Timer Ceramic Starter Kit for Hand-Thrown Ceramics:
Needle Tool- used for everything: cutting, scoring, classic.
Scoring tool - also used to join pieces, basically a needle tool with multiple prongs. Score two sides of something you want to join, like attaching the handle to a mug. Rub some slip (wet clay/water mixture) onto the scored parts and voila.
Ribs - metal ribs and plastic ribs to help scrape away excess clay and smooth edges. Useful for the hand technique of coiling, this tool allows you to take a bunch of clay rolls to a smooth wall in no time.
After 6 years of ceramics work, Sebastian still finds himself making discoveries in optimizing his process.
“It’s such an alchemic technique, I think everyone will keep learning this craft forever; it is endless.”